Herhangi bir web sitesini ziyaret ettiğinizde, tarayıcınızda çoğunlukla çerezler biçiminde bilgi depolayabilir veya alabilir. Bu bilgiler sizinle, tercihlerinizle veya cihazınızla ilgili olabilir ve çoğunlukla sitenin beklediğiniz gibi çalışmasını sağlamak için kullanılır. Bilgiler genellikle sizi doğrudan tanımlamaz, ancak size daha kişiselleştirilmiş bir web deneyimi sağlayabilir.
Gizlilik hakkınıza saygı duyduğumuz için, bazı çerez türlerine izin vermemeyi seçebilirsiniz. Ancak, bazı tanımlama bilgilerinin engellenmesi, site deneyiminizi ve sunabileceğimiz hizmetleri etkileyebilir.
BGMH'ye İzin Veriyorsunuz
Kesinlikle Gerekli Çerezler(Gerekli)
Bu çerezler web sitemize göz atmanız ve temel hizmetlerini kullanmanız için gereklidir ve izninizi gerektirmezler. Bu çerezler size web sitesinin temel işlevlerini (hesap erişimi, kullanılan dil, oynanan sipariş, ödeme) sunmamıza olanak tanır. vb) olup aynı zamanda kimlik doğrulama ve güvenlik amacıyla da kullanılabilir. Bunları devre dışı bırakırsanız temel isteğinizi yerine getiremeyiz.
Bu tanımlama bilgileri, web sitesi yapısını iyileştirmemize yardımcı olan çevrimiçi işlem davranışlarınız hakkında anonim bilgiler toplar. Bu tanımlama bilgilerini reddederseniz, web sitelerimizin ve hizmetlerimizin belirli özelliklerini kullanamayabilirsiniz.
Bu tanımlama bilgileri, hangi dili tercih ettiğiniz gibi tercihlerinizle ilgili yaptığınız seçimleri hatırlamamızı sağlar. Bu tanımlama bilgilerini reddederseniz, web'de gezinme verimliliğinin düştüğünü hissedebilirsiniz.
Bu çerezler, ilgilendiğiniz ürün ve hizmetlerin reklamını yapmak için kişiselleştirilmiş faaliyetler yürütür. Bu tanımlama bilgilerini reddederseniz, yine de ilginiz veya talebinizle pek alakalı olmayan reklamlar görürsünüz.


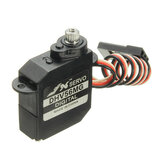


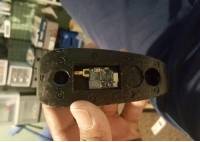


Hobbyboy Nemox once a servo gets under 5g you will not find HV. high voltage for a 5.6g is 6v. I think Bluebird or BlueArrow servos have hv at 7.4v I think. If you find some let me know